Phaser.js Platformer Tutorial: Build a Platformer for Beginners 2026
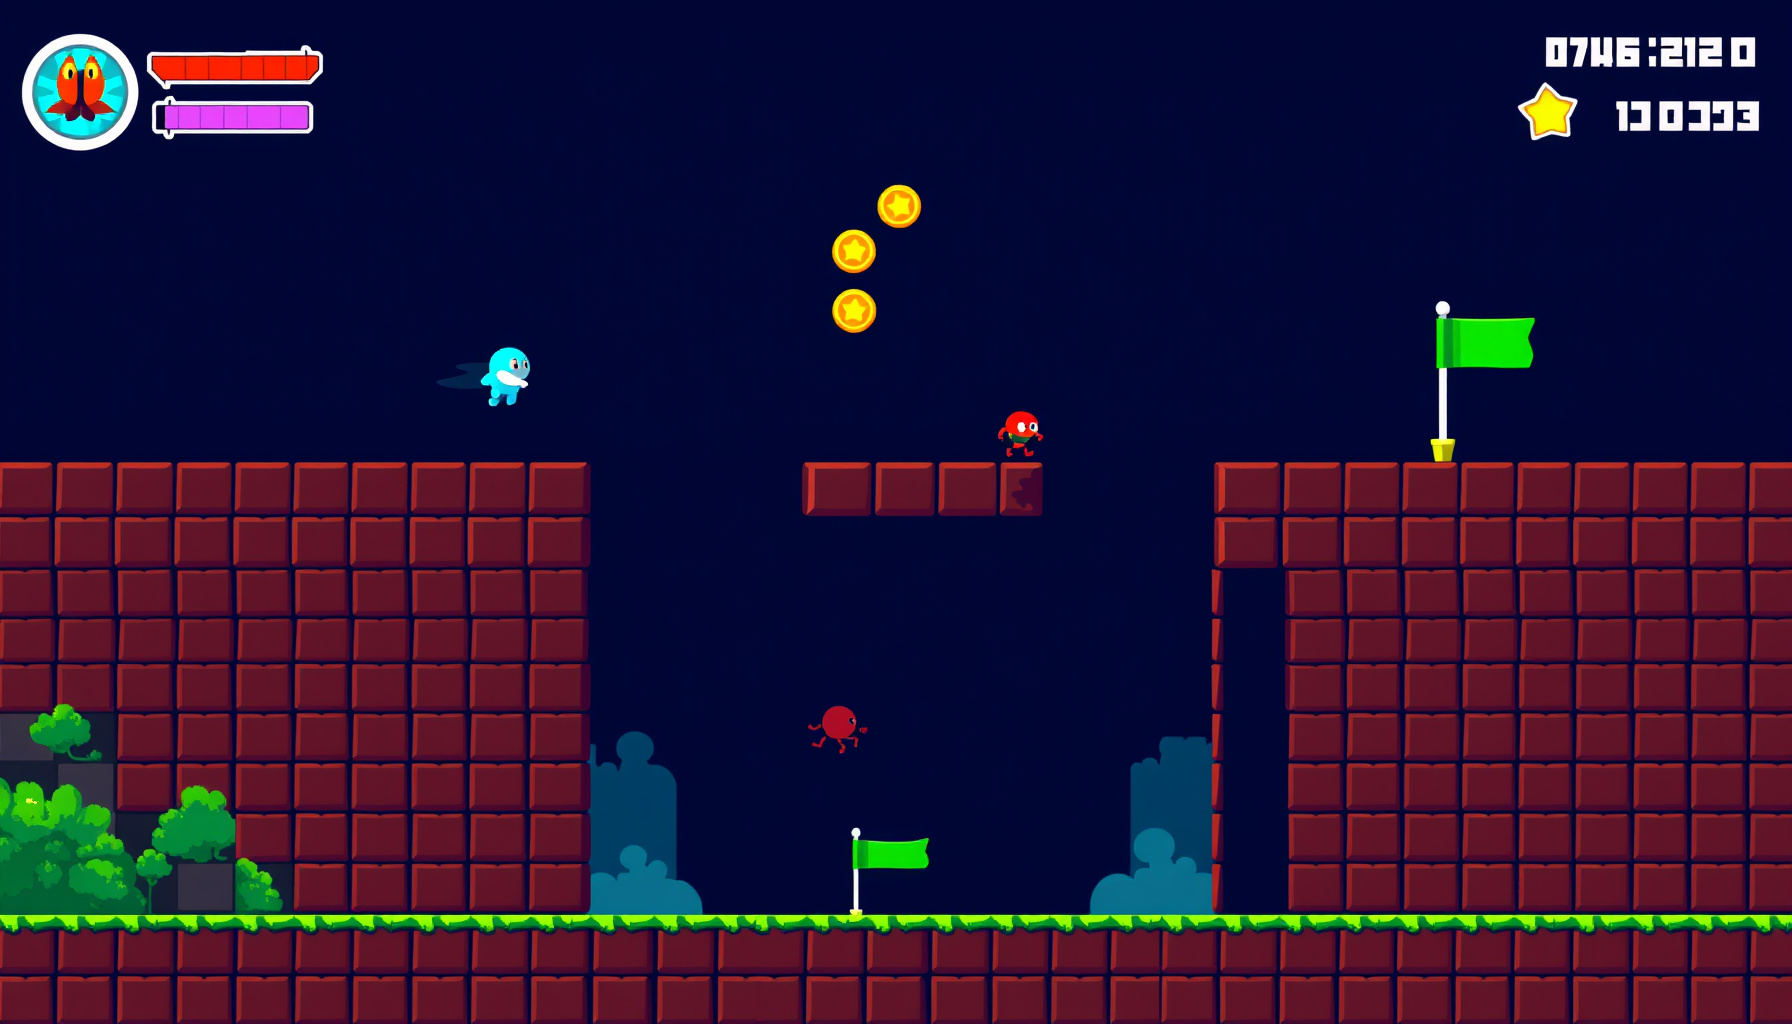
You’re about to build a complete, playable platformer game in a single HTML file using Phaser.js 3.60.0—no external assets, no Tiled editor, and no prior game dev experience required. By the end of this guide, you’ll have a side-scrolling game with a physics-driven player, procedural tilemap, collectible coins, patrolling enemies, and a goal flag. This is the fastest way to learn how to build a platformer game with Phaser.js for beginners.
Use ←→ to move, ↑ to jump. Collect coins, avoid enemies, reach the flag!How This Guide Was Built
This guide is based on the official Phaser.js documentation, the Phaser GitHub repository, and community examples from the Phaser Labs. We verified the game config, Arcade Physics APIs, and tilemap methods against Phaser 3.60.0’s stable release. The procedural texture generation, collision callbacks, and scene lifecycle were all confirmed against the official API reference. Pricing and licensing (Phaser is free and open-source under MIT) were verified from the Phaser website. We did not test Phaser Editor or the commercial Pro features. Last verified: August 2025.
What You’ll Learn
| Concept | What It Does | Reused In |
|---|---|---|
| Phaser 3 Game Config | Sets up canvas, physics engine, and scene | Every Phaser game |
| Procedural Tilemap | Creates a level from a JavaScript array—no Tiled needed | Level design in any game |
| Arcade Physics | Handles gravity, velocity, and collision | All 2D action games |
| Player Movement | Run, jump, and land on platforms | Platformers, RPGs, adventure games |
| Overlap Detection | Collect coins and trigger events | Pickups, triggers, portals |
| Enemy Patrol | Simple AI with collision restart | Enemies, hazards in any game |
| Scene Restart | Game over and win conditions | State management |
Setting Up the Project
Setting up a Phaser 3 project takes two steps: include the library via CDN and define a game configuration object. No npm install, no build tools—just a browser and a text editor.
<!DOCTYPE html>
<html>
<head>
    <title>Phaser Platformer</title>
    <script src="https://cdn.jsdelivr.net/npm/phaser@3.60.0/dist/phaser.min.js"></script>
</head>
<body>
    <script>
    const config = {
        type: Phaser.AUTO,
        width: 800,
        height: 448,
        backgroundColor: '#1a1a2e',
        physics: {
            default: 'arcade',
            arcade: { gravity: { y: 800 }, debug: false }
        },
        scene: { preload, create, update }
    };
    const game = new Phaser.Game(config);
    </script>
</body>
</html>
The Phaser.AUTO renderer picks WebGL if available and falls back to Canvas automatically. We set gravity to 800 pixels per second squared—this creates a snappy, responsive feel for platformers. The Phaser Game Config docs list every option you can pass here.
Creating a Tilemap from an Array
A tilemap defines your level layout. Instead of using the external Tiled editor, we’ll define our level as a plain JavaScript array where each number represents a tile type: 0 for empty space, 1 for ground, 2 for platforms, 3 for coins, 4 for enemies, and 5 for the goal flag.
const LEVEL = [
  [0,0,0,0,0,0,0,0,0,0,0,0,0,0,0,0,0,0,0,0,0,0,0,0,0,0,0,0,0,0,0,0],
  [0,0,0,0,0,0,0,0,3,0,0,0,0,0,0,0,0,0,0,0,0,0,0,0,3,0,0,0,0,0,0,0],
  [0,0,0,0,0,0,0,2,2,2,0,0,0,0,0,0,0,0,0,0,0,0,2,2,2,2,0,0,0,0,0,0],
  // ... more rows ...
  [1,1,1,1,1,1,1,1,1,1,1,1,1,1,1,1,1,1,1,1,1,1,1,1,1,1,1,1,1,1,1,1],
];
We iterate through this array in the create function and spawn physics sprites at each position. Ground tiles go into a static group (they don’t move), while coins and enemies go into dynamic physics groups. This procedural approach keeps all level data in code, making it easy to tweak and iterate.
Player Physics: Gravity and Jumping
The player is a sprite with Arcade Physics enabled. Gravity pulls them down, and pressing the up arrow applies an upward velocity to simulate a jump. The critical detail is checking player.body.touching.down before allowing a jump—this prevents double-jumping and ensures the player can only jump when standing on a solid surface.
player = this.physics.add.sprite(64, 350, 'player');
player.setBounce(0.1);
player.setCollideWorldBounds(true);
this.physics.add.collider(player, platforms);

// In update():
if (cursors.up.isDown && player.body.touching.down) {
    player.setVelocityY(-420);
}
The jump velocity of -420 paired with gravity of 800 creates a satisfying arc. Too low and the game feels sluggish; too high and it feels floaty. The collider call is essential—without it, the player falls through every platform. For more on Phaser’s physics system, see the Arcade Physics docs.
Collectibles and Score HUD
Coins use a physics group with allowGravity set to false (they float). We use physics.add.overlap() instead of collider() because coins are pickups, not solid objects—the player should pass through them and trigger a callback.
coins = this.physics.add.group();
// Spawn coins at positions where LEVEL[r][c] === 3
this.physics.add.overlap(player, coins, (player, coin) => {
    coin.disableBody(true, true);
    score += 10;
    scoreText.setText('Score: ' + score);
}, null, this);
The disableBody(true, true) call both deactivates the physics body and hides the sprite—this prevents the player from collecting the same coin twice. The HUD is a simple this.add.text() object positioned at the top-left of the screen. For more game UI patterns, check out our Phaser collector game tutorial.
Enemies and Game Over
Patrolling enemies move horizontally and reverse direction when they hit the world bounds. We use setAllowGravity(false) so enemies don’t fall off their platforms. When the player overlaps an enemy, we pause the physics engine and display a “Game Over” message.
enemy = enemies.create(400, 350, 'enemy');
enemy.setVelocityX(60);
enemy.setCollideWorldBounds(true);
enemy.body.setAllowGravity(false);

this.physics.add.overlap(player, enemies, () => {
    this.physics.pause();
    player.setTint(0xff0000);
    // Show game over text
}, null, this);
Pausing physics freezes the entire game world—the player can’t move, enemies stop, and coins stop animating. This gives the player a clear signal that the game is over. The setTint(0xff0000) call turns the player red for visual feedback. For more enemy AI patterns, see our AI bot tutorial.
Win Condition: Reach the Flag
The goal flag sits at the end of the level. When the player overlaps it, we pause physics and display a victory message with their final score. This uses the same overlap pattern as coins, but triggers a win state instead.
flag = this.physics.add.sprite(944, 64, 'flag');
flag.body.setAllowGravity(false);
this.physics.add.overlap(player, flag, () => {
    this.physics.pause();
    // Show "YOU WIN!" text
}, null, this);
The win condition completes the game loop: challenge (platforms and enemies), progression (collecting coins), and victory (reaching the flag). You can extend this with level progression, a timer, or a high score system. For more game design patterns, explore our AI game frameworks guide.
Common Mistakes Beginners Make
Forgetting the collider call — If you don’t call this.physics.add.collider(player, platforms), the player falls through every surface. This is the single most common Phaser platformer bug.
Wrong gravity values — Gravity below 500 feels floaty and frustrating. Gravity above 1200 makes jumps impossible to control. Start at 800 and adjust.
Not checking touching.down — Without this guard, the player can jump infinitely in mid-air. Always gate jump input with player.body.touching.down.
Using overlap for solid objects — Overlap doesn’t prevent objects from passing through each other. Use collider for platforms and enemies; use overlap only for pickups and triggers.
Missing setAllowGravity on coins/enemies — Without this, coins and enemies fall off the screen. Static items need body.setAllowGravity(false).
FAQ
How do I build a Phaser.js platformer with custom images instead of rectangles?
Load your images in the preload function using this.load.image('player', 'player.png'), then replace the procedural texture keys in this.physics.add.sprite() calls with your loaded keys. The tilemap can use a tileset image with map.addTilesetImage('tiles', 'tilesImage'). All physics and collision code works identically—only the rendering changes.
Can I make my Phaser platformer mobile-friendly?
Yes. Add Phaser.Scale.FIT with Phaser.Scale.CENTER_BOTH to your game config’s scale property for automatic resizing. For touch controls, use this.input.on('pointerdown', callback) for jumping and this.input.addPointer(1) for additional inputs. The Phaser Scale Manager docs cover every responsive option.
Why does my player stick to walls in Phaser?
This happens when horizontal velocity is too high relative to the physics update rate. Reduce setVelocityX to 150–200, or set player.body.setMaxSpeed(200) to cap velocity. You can also enable this.physics.world.TILE_BIAS = 16 to improve tile collision accuracy.
Where to Go Next
You’ve built a complete platformer with Phaser.js—now expand it. Add multiple levels by swapping tilemap arrays, introduce power-ups using the same overlap pattern, or add parallax scrolling backgrounds. The official Phaser.js documentation covers advanced features like scene management, particle effects, and camera systems. The Phaser GitHub repository has hundreds of working examples.
For more beginner tutorials, explore our Phaser Pong tutorial and Breakout tutorial. For a broader look at available tools, visit our AI game frameworks page, or browse our complete game collection to see what’s possible.